Principios para crear una dApp

Este blog tiene como objetivo mostrar la creación de una aplicación descentralizada usando ethereum y web3.js. En este caso se usará la red de prueba llamada sepolia y diversas herramientas para consultar los NFT creados.
Enlaces
Requisitos
- Node.js (versión v18.16.0 o superior)
- NPM (versión 9.5.1)
- Metamask en el navegador Link
Dependencias externas
En este paso vamos a crear diversas cuentas gratuitas con diversos proveedores que nos harán el trabajo más fácil
- Infura: creamos una cuenta y extraemos nuestro token para la red Sepolia
- Metamask: creamos nuestra cuenta y guardamos el MNEMONIC (12 palabras claves cuando se crea la cuenta)
Pasos a seguir
- Crear un smart contract
- Crear una aplicación en React para usar el smart contract
Creación del smart contract
El smart contract me permitirá generar los NFT fácilmente, también agregaremos seguridad al contrato para que solo permita ser utilizado por un par de wallets admin. Para esto usaremos truffle
Instalación de truffle
npm install -g truffleCreación de proyecto
mkdir smart-contract
cd smart-contract
truffle unbox metacoin
npm install @openzeppelin/contracts @truffle/hdwallet-provider dotenv
Ahora vamos a crear variables de entorno, creamos un archivo llamado .env en la raiz del proyecto:
MNEMONIC= # Poner las 12 palabras clave a la hora de crar el wallet en metamask
OWNERS_ADDRESS= # Tu dirección del wallet de metamask
INFURA_TOKEN= # Poner el token extraido de infura
Abrimos nuestro proyecto y eliminamos los archivos contenidos en contracts/, creamos uno nuevo llamado dAppContract.sol
// dAppContract.sol
// SPDX-License-Identifier: MIT
pragma solidity ^0.8.0;

import "@openzeppelin/contracts/token/ERC721/extensions/ERC721URIStorage.sol";
import "@openzeppelin/contracts/token/ERC721/IERC721.sol";

contract dAppContract is ERC721URIStorage {
    address[] private _owners;
    uint256 private _tokenId;

    constructor(
        string memory name,
        string memory symbol,
        address[] memory initialOwners
    ) ERC721(name, symbol) {
        for (uint256 i = 0; i < initialOwners.length; i++) {
            _owners.push(initialOwners[i]);
        }
    }

    // ** Auth Functions ** //
    function addOwner(address owner) external {
        require(verifyOwner(msg.sender), "El remitente no esta autorizado");

        // Check param owner not in _owners array
        require(!verifyOwner(owner), "La nueva direccion ya existe");
        _owners.push(owner);
    }

    function verifyOwner(address sender) private view returns (bool) {
        for (uint256 i = 0; i < _owners.length; i++) {
            if (_owners[i] == sender) {
                return true;
            }
        }
        return false;
    }
    // ** ** //

    // ** mint function ** //
    function safeMint(address account, string memory tokenURI) public {
        require(verifyOwner(msg.sender), "El remitente no esta autorizado");
        _tokenId = _tokenId + 1;
        _safeMint(account, _tokenId);
        _setTokenURI(_tokenId, tokenURI);
    }
    // ** ** //
}
El contrato generado posibilita la creación de tokens mediante la función safeMint. Para ello, se debe proporcionar un tokenURI, que debería ser un archivo en IPFS en la red descentralizada, junto con una dirección de billetera a la cual asignar dicho token. Es importante destacar que ningún tokenId de este contrato tendrá el mismo valor, dado que este valor se incrementa automáticamente. Como medida de seguridad, solo los propietarios del contrato tienen la capacidad de generar estos tokens, y sus direcciones están almacenadas en un arreglo de memoria llamado “_owners”.
Luego nos vamos al archivo migrations/1_deploy_contracts.js y lo reemplazamos con el siguiente contenido:
// 1_deploy_contracts.js
const path = require("path");
const fs = require("fs");

const dAppContract = artifacts.require("dAppContract");

module.exports = function (deployer) {
  const { OWNERS_ADDRESS: owners } = process.env;
  deployer.deploy(dAppContract, "dApp NFTs", "DAPP", owners.split(","));

  const abi = dAppContract.abi;

  const abiPath = path.join(__dirname, "abi.json");
  fs.writeFileSync(abiPath, JSON.stringify(abi, null, "\t"));
};
Finalmente modificamos el archivo truffle-config.js, en donde enlazaremos la red sepolia de este ejemplo (en entornos productivos, esta red debería ser la mainnet), quedando así:
// truffle-config.js
require("dotenv").config();
const { MNEMONIC, INFURA_TOKEN } = process.env;

const HDWalletProvider = require("@truffle/hdwallet-provider");

module.exports = {
  networks: {
    sepolia: {
      provider: () =>
        new HDWalletProvider({
          mnemonic: MNEMONIC,
          providerOrUrl: `https://sepolia.infura.io/v3/${INFURA_TOKEN}`,
        }),
      network_id: 11155111, // Sepolia's network ID
      gas: 4465030,
    },
  },
  mocha: {},
  compilers: {
    solc: {
      version: "0.8.20",
    },
  },
};
Ahora solo queda compilar y subir el contrato a la red sepolia (Recuerda primero obtener algunos sepolia eth faucet, aquí puedes conseguir algunos):
truffle compile
truffle migrate --network sepolia
Si todo salió bien debes tener un resultado como el siguiente:
1_deploy_contracts.js
=====================

   Deploying 'dAppContract'
   ------------------------
   > transaction hash:    0x4...
   > Blocks: 1            Seconds: 20
   > contract address:    0xc59b7A1FD55DD22211595f39d5781f9E907F9B66
   > block number:        4568918
   > block timestamp:     1698352488
   > account:             0x8...
   > balance:             1.602542214412301204
   > gas used:            2288766 (0x22ec7e)
   > gas price:           2.500000007 gwei
   > value sent:          0 ETH
   > total cost:          0.005721915016021362 ETH

   > Saving artifacts
   -------------------------------------
   > Total cost:     0.005721915016021362 ETH
donde la dirección del smart contract es: 0xc59b7A1FD55DD22211595f39d5781f9E907F9B66, además, se ha generado un archivo abi.json que contiene la estructura del smart contract que usaremos con web3.js más adelante.
Creación de aplicación React para usar el smart contract
npm create vite@latest dApp -- --template react-ts
cd dApp
npm install web3@1.8.2
Creamos nuestro archivo .env en la raíz del proyecto:
VITE_ADDRES_SMART_CONTRACT= # Dirección del smart contractCopia el contenido del archivo abi.json creado en el smart-contract al proyecto react en el archivo: src/constants/ABI.ts
export const abi = [
    ...EL CONTENIDO DEL ARCHIVO abi.json
]
Modificamos el archivo App.tsx así:
import { useEffect, useState } from "react";
import { ReturnSchema, initEthereum, safeMint } from "./service";
import "./App.css";

function App() {
  const [response, setResponse] = useState<ReturnSchema | null>(null);
  const [loading, setLoading] = useState<boolean>(false);
  useEffect(() => {
    initEthereum();
  }, []);

  const mint = async () => {
    setLoading(true);
    const res = await safeMint({
      address: "0x8...", // Dirección a la cual asignarle el token
      tokenURI: "ipfs://token",
    });
    setLoading(false);
    setResponse(res);
  };

  return (
    <>
      <button onClick={mint} disabled={loading}>
        {loading ? "Generando el NFT..." : "Generar NFT"}
      </button>
      {response && (
        <div>
          Se ha generado el NFT correctamnete,
          <a
            href={`https://sepolia.etherscan.io/tx/${response?.transactionHash}`}
            target="_blank"
          >
            Ver en etherscan
          </a>
        </div>
      )}
    </>
  );
}

export default App;
creamos un archivo service.ts el cual tiene el siguiente contenido:
import Web3 from "web3";
import { abi } from "./constants/ABI";
import { Contract } from "web3-eth-contract";

const addressSmartContract = import.meta.env.VITE_ADDRES_SMART_CONTRACT;
let userAccount: string;
let erc20Contract: Contract;
let isInitialized = false;

export const initEthereum = async () => {
  if (isInitialized) {
    return;
  }
  if ("ethereum" in window) {
    const provider = window?.ethereum;

    if (provider) {
      provider
        .request({ method: "eth_requestAccounts" })
        .then((accounts: string[]) => {
          userAccount = accounts[0];
          console.log(`Selected account is ${userAccount}`);
        })
        .catch(() => {
          return;
        });

      provider.on("accountsChanged", function (accounts: string[]) {
        userAccount = accounts[0];
        console.log(`Selected account changed to ${userAccount}`);
      });
      const web3 = new Web3(provider);
      erc20Contract = new web3.eth.Contract(abi, addressSmartContract);
    }
    isInitialized = true;
  }
};

interface CertSchema {
  address: string;
  tokenURI: string;
}
export interface ReturnSchema {
  blockHash: string;
  blockNumber: number;
  contractAddress: null;
  cumulativeGasUsed: number;
  effectiveGasPrice: number;
  from: string;
  gasUsed: number;
  logsBloom: string;
  status: boolean;
  to: string;
  transactionHash: string;
  transactionIndex: number;
  type: string;
}
export const safeMint = async ({
  address,
  tokenURI,
}: CertSchema): Promise<ReturnSchema> => {
  if (!isInitialized) {
    await initEthereum();
  }
  const response = await erc20Contract.methods
    .safeMint(address, tokenURI)
    .send({ from: userAccount });
  return response as ReturnSchema;
};
Los fragmentos de código anteriores permiten, mediante un clic en un botón, verificar la activación de la billetera en el navegador, inicializar el contrato inteligente con web3.js y llamar al método creado en nuestro contrato inteligente para generar los tokens.
¡Listo! ya podemos generar nuestros NFT a través de la aplicación con React, recuerda recargar tu wallet con ethereums, aquí tienes una opción: Sepolia faucet
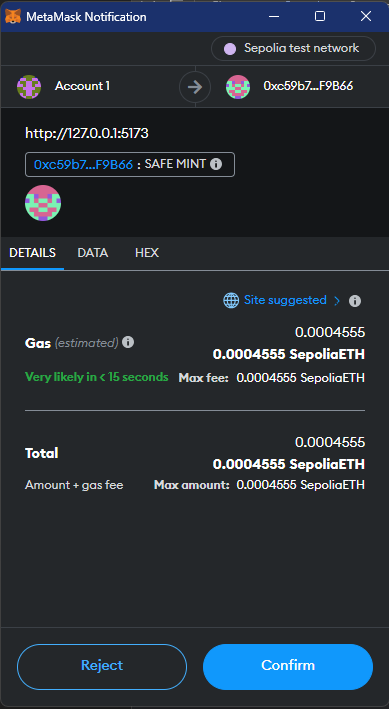
Al presionar el botón del código, debería solicitarte a través de la extensión de metamask la confirmación de la transacción.
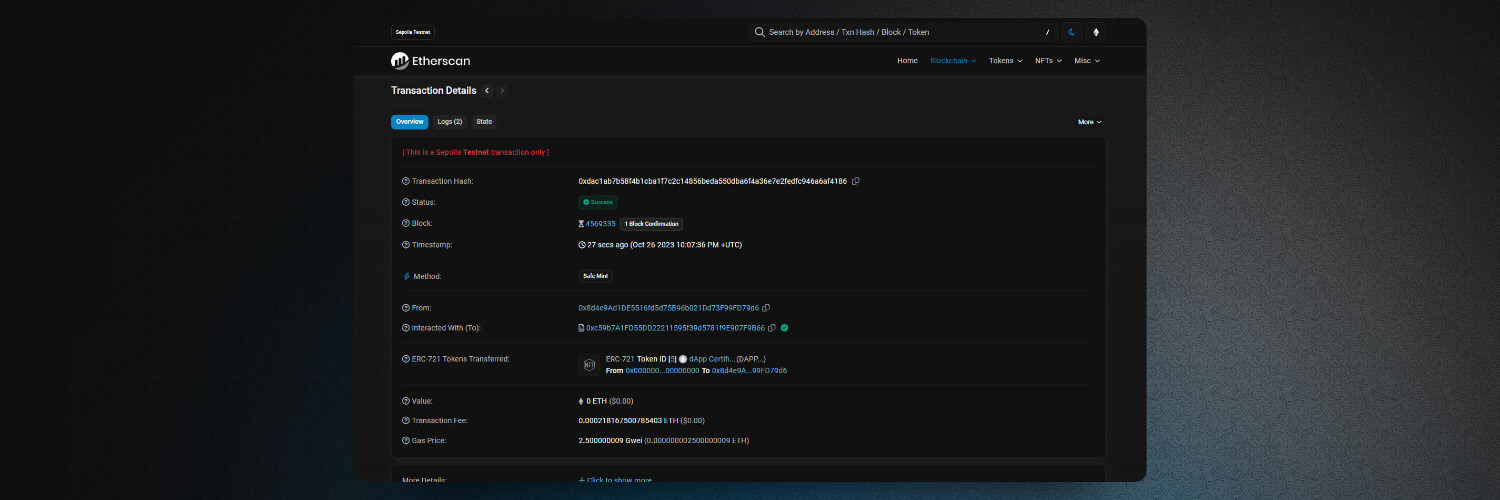
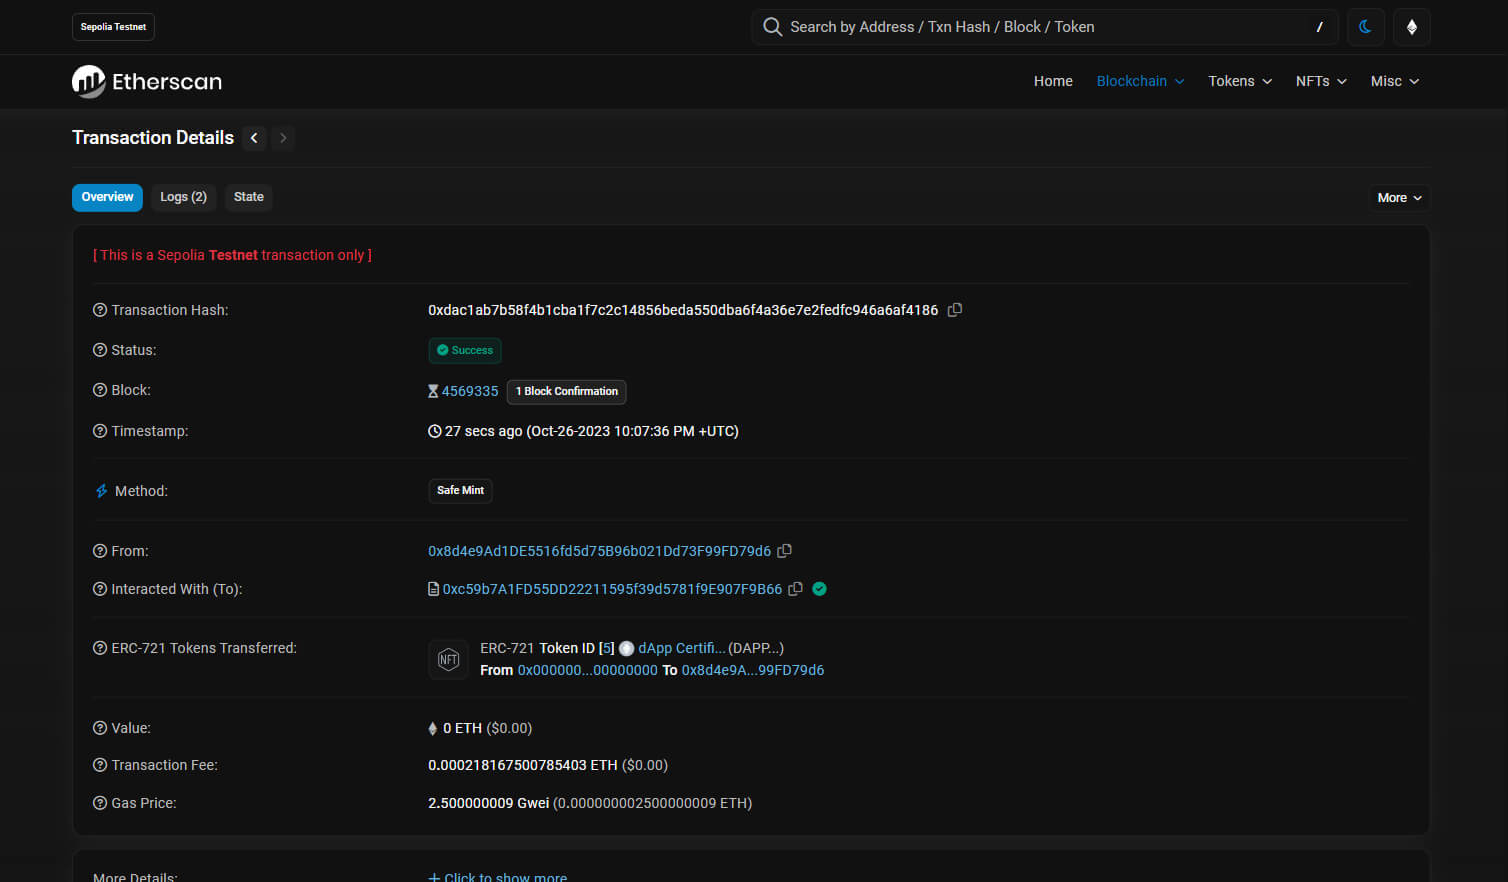
Finalmente en etherscan debería verse así:
¿Qué sigue?
Mejorar la aplicación react, consultar los tokens que hay en la red actualmente asociados al smart contract, crear un backend con temas lógicos y dejar el frontend solo para consultas